Ever tried to maneuver a marionette on strings? The coordination, the balance – it’s quite an art. That’s what working with Puppeteer proxy feels like sometimes.
Weaving through the digital threads of automation and web scraping, balancing IP addresses, handling browser instances…it can feel like you’re juggling a performance all by yourself. But here’s where I let you in on my little secret…
I’ve discovered some nifty tricks over time that have made me more of a Puppeteer maestro than just another puppet master! Whether it’s setting up proxies seamlessly or preventing those pesky IP blocks from ruining your show – there are ways to get around them all!
Eager for these insights?
So strap in, we’re about to dive deep into how we can take control of our own digital “marionettes”.
Understanding Puppeteer and Proxies
If you’re into web scraping or automation, it’s time to become acquainted with Puppeteer. Developed by the Chrome team at Google, Puppeteer is a Node.js library that provides high-level API control over headless Chromium browsers or non-headless Chrome browsers.
The real magic happens when we bring proxies into play. But why are they so important? Let’s dive deeper.
The Power of Proxies in Puppeteer
A proxy acts as a go-between for your machine and the web, concealing your IP address from sites you interact with to prevent bans when doing intense activities such as data collection. It hides your IP address from websites you interact with, helping avoid bans while performing heavy-duty tasks like data scraping.
Puppeteer supports HTTP, HTTPS, and SOCKS5 proxies – each having their own strengths depending on what type of network requests you’re making. These types make up our trio of superheroes for all sorts of browser-based operations.
Different Flavors: HTTP Proxy vs HTTPS Proxy vs SOCKS5 Proxy
An HTTP proxy deals only with HTTP traffic – perfect for most browsing activities but lacks encryption which can be problematic if security is a concern.
HTTPS proxy servers encrypt your data offering more secure browsing than their unsecured counterparts – think Batman upgrading his Batmobile. Finally, there’s SOCKS5; this type supports both TCP and UDP protocols providing even greater versatility.
Better Web Scraping With Proxies
You might ask yourself why use Puppeteer proxy package? Well, remember how Superman sometimes needs help from Justice League to defeat super-villains?
Puppeteer-proxy is that helping hand when dealing with tasks like web scraping and automation. It lets you easily set up a proxy server, even enabling IP rotation to prevent your bot from being detected or blocked by the target website.
But proxies aren’t just about solving CAPTCHAs. They’re also a great tool for anonymous browsing, keeping your data private, and helping manage everything smoothly.
It’s like having a secret identity when you’re surfing the web. The puppeteer-proxy package makes it a breeze to set up and rotate your IP, giving you the freedom to handle hefty tasks without worrying about getting banned. So with Puppeteer and proxies at your side, you’ve got all the power needed for robust browser-based operations.
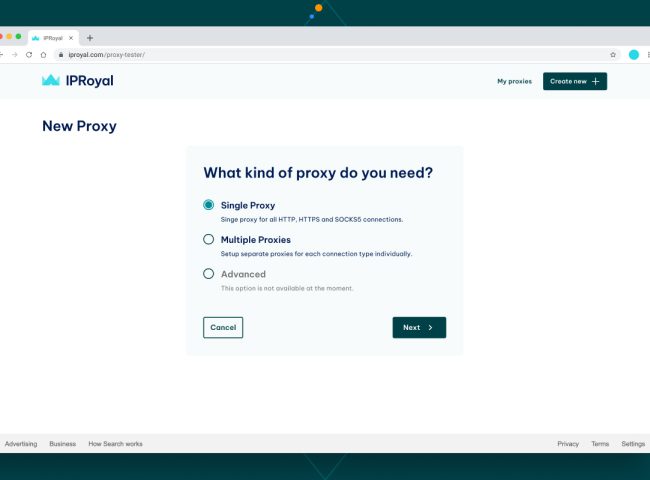
Setting Up a Proxy Server with Puppeteer

Working with proxies in Puppeteer is quite straightforward. To start, you need to launch the browser instance specifying your proxy server’s address and port. To get started with a proxy server, you’ll need to install Puppeteer and set up your environment first.
You’ll want to kick things off by installing Puppeteer proxy and setting up your environment if it isn’t already. It’s important to note that Node.js needs to be installed as well since Puppeteer is essentially a Node.js library developed by Google’s Chrome team.
npm i puppeteer
To run your browser instance through a proxy, add the –proxy-server argument when launching Puppeteer proxy:
const puppeteer = require('puppeteer'), to configure proxies requiring authentication, useProxy is employed. (async () => {
  const browser = await puppeteer.launch({
    args: ['--proxy-server=http://my-proxy.com:8080']
  });  const page = await browser.newPage();
})();
Configuring Proxy Authentication

If your proxy requires authentication, there are some extra steps involved in configuring this within Puppeteer proxy high-level API. You would use an open-source package known as ‘proxy-chain’ for this purpose which lets us handle http requests needing basic HTTP authentication seamlessly.
const puppeteer = require('puppeteer'), to configure proxies requiring authentication, useProxy is employed.
const useProxy = require('Puppeter-use-proxy');let page;
let chrome;async function setUpBrowser() {
  chrome = await Puppeter.launch({ headless: false });
  page = await chrome.newPage();  // Setup the plugin.
  useProxy(page);  // Set up our actual on-page auth handler.}
setUpBrowser().catch(console.error);module.exports = { getChrome: async () => { return chrome }, getPage: async () => { return page } };
This piece of code lets Puppeteer use the proxy server and authenticates your request with the credentials provided. You can now run all network requests via this authenticated proxy.
Proxy Rotation
Whether you’re knee-deep in web scraping tasks or visiting a target website often, it’s crucial to tread carefully. You don’t want to ruffle any feathers with excessive site visits.
Setting up a proxy with Puppeteer is simple. Start by launching your browser instance, and specifying your proxy server’s details. Install Node.js and Puppeteer if you haven’t already. To use an authenticated proxy, utilize ‘proxy-chain’. Remember to tread lightly when frequently visiting or scraping websites.
IP Rotation Strategies in Puppeteer
Puppeteer, the Node.js library from Google Chrome’s squad, has lots of utilities for activities such as web scraping and automation. One of these is IP rotation. But why would you need to rotate your IP address?
To answer this question, let’s think about what happens when you visit a website multiple times from the same location. The target website might notice repetitive visits from the same IP address and block it out of suspicion.
Now imagine trying to scrape data or automate browsing on such websites – it wouldn’t take long before they catch on and lock you out. That’s where IP rotation comes into play. It involves using multiple IPs to prevent detection or blocking.
Using Residential or Data Center Proxies for IP Rotation
Residential proxies, which are tied to specific geographic locations, can be effective tools for rotating IPs due to their wide distribution across various regions.
Datacenter proxies can also be used but bear in mind that they’re not associated with an ISP like residential ones are so they may raise more eyebrows if detected by websites.
The Nitty-Gritty: How Does This Work?
In essence, every time Puppeteer launches a browser instance with different proxy settings – each corresponding to different proxy servers – we effectively change our online identity.
This way, even if one puppeteer instance gets blocked while attempting network requests on some pages because its server got flagged down as suspicious; there’s always another one ready at bay with fresh credentials.
Avoiding Detection While Scraping With Puppeteer Proxy Server
While rotating IPs is a powerful strategy, it’s not the only one. You also need to ensure that your scraping tasks are human-like and avoid causing suspicion.
This means making sure you don’t bombard websites with too many requests at once or always visit them in the same order.
Error Messages? Don’t Panic.
When things go sideways, it’s pretty standard. It occurs frequently.
IP rotation is key when using Puppeteer for web scraping, helping you avoid getting blocked by target websites. It involves swapping out IPs – using residential or data center proxies – to evade detection. But remember, your tasks need to seem human-like and not raise suspicion. And if things go wrong? Don’t sweat it; hiccups are common.
Troubleshooting Puppeteer Proxy Server Issues
Using proxies with Puppeteer proxy can be a game-changer. But sometimes, things go south and you need to troubleshoot common issues that might pop up.
Checking the Proxy Configuration
The first step in troubleshooting is checking your proxy configuration. Ensure your Puppeteer proxy code specifies the correct proxy server address and port. Misconfiguration here could lead to error messages or failed network requests.
If you’re using external proxies requiring authentication, make sure you’ve entered accurate credentials for them as well. This guide on how to start with Puppeteer proxy Debugging can give more insights into this aspect of troubleshooting.
Testing Proxy Connectivity
Moving on, let’s test our proxy connectivity. Launching Puppeteer proxy should not just open up a headless Chrome instance but also ensure a successful connection through your chosen proxy server. In case of any disconnection issue, try switching between non-headless Chrome mode and headless Chromium browser settings – sometimes these tweaks help.
A quick tip: If launching puppeteer leads to frequent HTTP request failures from target website(s), consider integrating different types of proxies like residential proxies or datacenter ones into your setup – they often come in handy while dealing with stubborn websites.
Verifying Proxy Response
Last but not least; verifying responses from your puppteer-proxy servers is crucial too. Checking HTTP responses returned by each request sent via Puppeteer helps identify potential issues early on – before they become big problems that take longer time (and effort) to fix later.
This resource about web scraping tasks involving Selenium and Python, although it doesn’t specifically focus on Puppeteer proxy itself, provides valuable information about similar concepts that are applicable here as well.
Enabling Verbose Logging for Debugging
While troubleshooting puppeteer proxy server issues, enabling verbose logging can be your best friend. It helps identify what’s going wrong and where it is happening in your code.
This process gets down to business by firing up the in-depth logging features that Puppeteer proxy readily offers. It lets you peek into every HTTP request made, along with its matching response. So spotting mistakes or irregularities becomes a breeze.
Integrating Puppeteer with proxies can give your web scraping a power boost. It starts with making sure you’ve got the right server address, port, and credentials in your proxy configuration. The next step is testing connectivity – if you can launch successfully, that means you’re good to go through your chosen proxy server. You also need to stay sharp on HTTP responses; catching any potential issues early makes things easier down the line.
Overcoming IP Blocking in Puppeteer
The challenges of IP blocking can be a thorn in the side of web scrapers. But, there’s good news. With Puppeteer proxy, you’ve got several strategies to dodge this hurdle.
Implementing Request Throttling
To start with, request throttling is an effective way to keep your activities under the radar. By limiting the number of requests sent per minute, you lessen the risk of being flagged as suspicious by target websites.
You’re playing nice with their servers and staying within their rate limits – win-win.
Besides request throttling, rotating IPs is another surefire strategy to overcome IP blocking in Puppeteer proxy. This method involves using multiple IP addresses which makes it difficult for sites to detect and block your scraping tasks.
Different Types of Proxies: The Good Guys In Disguise
Moving on from simple solutions like throttle controls and rotations let’s take a deep dive into proxies. Remember those old spy movies where agents use disguises? That’s essentially what we’re doing here but with internet identities.
- Datacenter Proxies: These are widely used due to their speed and affordability but they might get easily detected because they come from cloud server providers instead of Internet Service Providers (ISPs).
- Residential Proxies: They appear more legitimate than datacenter proxies as they originate from real residential IPs assigned by ISPs. A bit pricier though.
Proxies, specifically ‘residential’ and ‘datacenter proxies’, can be a great asset in your IP rotation strategy. By using different types of proxies, you give yourself an ever-changing cloak of invisibility to sneak past those pesky IP bans.
Captcha Solving: The Secret Handshake
Wrapping up, let’s not overlook the complexity of CAPTCHAs – those puzzles websites use to verify human identity. They’re those tricky puzzles websites use to check if you’re human or not. No need to worry though, as many external services are available for assistance.
Overcoming IP blocking in Puppeteer proxy can be done with a few smart moves. Use request throttling to limit your requests and stay off the radar, rotate IPs for anonymity, and put on a good disguise with proxies – especially residential ones. And when you hit CAPTCHAs? Don’t fret – there’s help available.
Advanced Proxy Configuration in Puppeteer
If you’ve used Puppeteer proxy, Google’s open-source package developed for web automation, you know the power it holds. But have you tapped into its advanced proxy configuration capabilities yet? Let’s discuss how to gain greater authority over your proxies.
Using ProxyChains for More Control
Puppeteer provides a high-level API to control headless Chrome or Chromium browsers. When using Puppeteer with proxies, we often need a bit of extra muscle – that’s where ProxyChains comes in.
ProxyChains is an open-source tool that allows users to route their requests through a chain of proxy servers. It can be integrated directly into your Puppeteer proxy code and lets us leverage multiple IP addresses when running our browser instance.
This might sound like tech magic but let me tell you, configuring this isn’t as complex as decoding hieroglyphics. The key here lies in managing network requests smartly and understanding common issues related to puppeteer integration with external proxies.
A Glimpse Into Setting Proxies With Puppeteer Proxy and ProxyChain Package
const puppet = require('puppeteer');
const { anonymizeProxy } = require('proxy-chain');(async () => {
    The original proxy URL is 'http://proxy.example.com:8000'.
    const newUrl = await anonymizeProxy(oldUrl); // Anonymizes the proxy    const browserInstance = await puppet.launch({
        args: [`--proxy-server=${newUrl}`],
        headless: false,
    });})();
In this snippet above, notice how we use the ‘anonymizeProxy’ method from ‘proxy-chain’ package to create an anonymous proxy URL. We then use this in the launch method of the Puppeteer proxy.
But what if your original proxy requires authentication? Don’t sweat. ProxyChain’s got you covered. You can include the username and password in the URL itself like so: http://username:[email protected]:8000
Debugging in Puppeteer with Proxies
The art of debugging is essential when working with proxies and Puppeteer. Uncovering evidence and piecing together the puzzle is key when debugging with proxies and Puppeteer proxy, much like a skilled detective.
Proxies play an important role in your Puppeteer proxy tasks, especially when it comes to web scraping or automation. But sometimes things don’t go as planned – network requests may fail, error messages pop up unexpectedly, or the server refuses connection due to incorrect proxy settings. Let’s look at how we can fix these issues effectively using debugging techniques.
Enabling Verbose Logging for Debugging
A valuable tool in our debugging arsenal is verbose logging. It gives us a detailed account of everything that’s happening under the hood during the execution of puppeteer code which includes HTTP request/response data too. To enable verbose logging within Puppeteer proxy API, add {‘dumpio’: true} into your browser launch options like so:
const browser = await puppeteer.launch({
    dumpio: true,
});
This will let Puppeteers spew out all logs directly from Chromium Browser console right onto your terminal screen – including any possible error-related details regarding proxy connections.
Sleuthing Network Requests
In addition to verbose logging, inspecting network requests helps detect common issues such as invalid credentials being passed along HTTP responses from target websites or getting blocked by anti-scraping measures employed by some sites because they detected high-level api calls originating from the same IP address repeatedly (aka non-headless Chrome).
page.on('request', request => {
    console.log('Request:', request.url());
});page.on('response', response => {
    console.log('Response:', response.status(), response.url());
});
By doing this, you’ll gain a deeper insight into how the server handles your Puppeteer requests. Always keep an eye on HTTP status codes. For instance, code 407 could hint at potential issues.
Mastering debugging with Puppeteer and proxies is like detective work. Uncover issues such as failed network requests or server connection refusals using verbose logging and inspecting network responses. Keeping a close watch on HTTP status codes can also give clues to potential problems.
FAQs about Puppeteer Proxy
What is Puppeteer proxy?
Puppeteer proxy refers to using a proxy server with the Puppeteer library, which helps in web scraping tasks and avoids IP blocking.
How do you set a proxy in Puppeteer?
To set up a proxy in Puppeteer, launch your browser instance with the correct configuration that includes your chosen proxy’s address and port number. or click there to check our tutorial.
What is the best proxy for Puppeteer?
The choice of the best puppet depends on your needs. HTTP, HTTPS, or SOCKS5 proxies are commonly used. Each has its own strengths depending on whether you need anonymity or speed.
Is Puppeteer proxy headless true or false?
Puppeteer proxy runs headless by default (true), but it can also be configured to run non-headless if needed for certain debugging tasks.
Conclusion
Mastering Puppeteer proxy is like mastering an art form. It’s a balancing act, sure, but it’s one you can manage.
From setting up your proxies seamlessly to preventing IP blocks – these are skills you now have under your belt.
You’ve learned the ropes of rotating IPs and using different types of proxies. You know how to troubleshoot common issues and configure advanced settings for granular control over your tasks.
With your newfound knowledge, you are now capable of mastering the art of Puppeteer proxy.

I’m all about the thrill of webscraping, gathering data, and crafting witty narratives that make even the geekiest topics an enjoyable read. Join me on this wild ride through the web’s secret alleys, armed with humor and a trusty keyboard!


Leave feedback about this