Authentication methods are crucial for ensuring the security and integrity of online systems and services. In the context of Smartproxy, a leading proxy service provider, authentication methods play a fundamental role in safeguarding user accounts and controlling access to proxy servers.
Authenticating user identity helps prevent unauthorized access, data breaches, and potential misuse of resources. Therefore, it is essential to understand the various authentication methods available in Smartproxy and how they can be implemented.
Smartproxy offers three primary authentication methods:
- IP Whitelisting: This method involves specifying trusted IP addresses allowed to access the proxy servers. It provides a secure and reliable way to control access and minimize the risk of unauthorized usage.
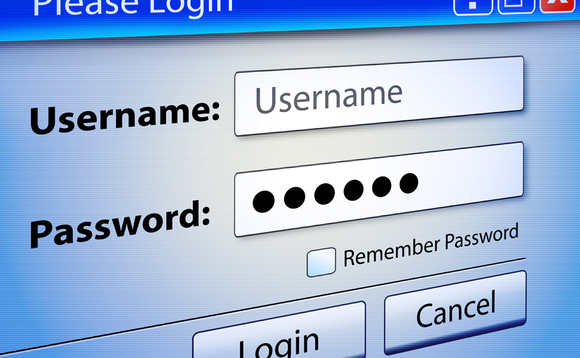
- Username and Password: Users can authenticate their accounts using a unique combination of a username and password. This method is widely used and offers a balance between security and convenience.
- Token-based Authentication: Smartproxy also supports token-based authentication, where users generate and use secure tokens or API keys for authentication purposes. This method is highly secure and suitable for automation and integration scenarios.
To set up authentication in Smartproxy, users can follow step-by-step guides for each method provided by the platform. These guides offer detailed instructions on how to configure and implement IP Whitelisting, Username and Password authentication, and Token-based authentication.
When choosing the right authentication method, users should consider both security and convenience factors. Security considerations include evaluating the strength of authentication mechanisms and understanding potential vulnerabilities. Convenience considerations involve assessing the ease of implementation, user access control, and compatibility with existing systems and workflows.
Lastly, understanding common issues and troubleshooting techniques related to authentication can help users resolve any potential problems efficiently. Smartproxy provides resources and support to address common authentication issues, ensuring a smooth and secure user experience.
By familiarizing themselves with the and making informed choices based on security and convenience, users can effectively manage access to and protect their online activities.
Key takeaway:
- IP Whitelisting: Smartproxy offers IP Whitelisting as an authentication method, allowing users to restrict access only to trusted IP addresses, enhancing security.
- Username and Password: Smartproxy also supports Username and Password authentication, providing a simple and familiar method for users to authenticate their access to the proxy service.
- Token-based Authentication: For enhanced security and convenience, Smartproxy offers token-based authentication, allowing users to generate and use tokens for authentication instead of traditional credentials.
What are Authentication Methods?
Discover the key to secure online activities with Smartproxy authentication methods. In this section, we explore the significance of authentication and its impact on safeguarding your digital presence. Uncover the vital aspects of authentication while delving into the sub-sections that shed light on its importance. Brace yourself for an enlightening journey filled with facts, figures, and events that highlight the need for robust authentication methods. Get ready to enhance your online security like never before.
Understanding the Importance of Authentication Methods
Authentication is an essential aspect of online security as it ensures the verification of users accessing a system. Recognizing the significance of authentication is crucial for safeguarding critical information and deterring unauthorized entry. Employing proper authentication methods like IP whitelisting, username, and password, or token-based authentication guarantees that only authorized individuals can gain access to the system. While selecting the appropriate authentication method, it is vital to consider both security and convenience. A valuable tip is to opt for multi-factor authentication to add an extra layer of security, combining something the user knows (password) with something they possess (token or biometric data). This remarkably enhances the authentication process.
Authentication Methods in Smartproxy
When it comes to authentication methods in Smartproxy, there are several options to ensure secure access. Let’s dive into the various approaches that users can take advantage of. From IP whitelisting to username and password authentication, as well as token-based authentication, each method provides a unique layer of security and functionality. So, whether you prefer strict whitelist control, traditional login credentials, or a more modern token-based approach, Smartproxy has you covered. Stay protected and authenticated with these powerful options.
1. IP Whitelisting
- IP whitelisting is a crucial authentication method Smartproxy utilizes to guarantee secure access to its services. To set up IP whitelisting, follow these steps:
- Access your Smartproxy dashboard.
- Navigate to the “Authentication” section.
- Choose the “IP Whitelisting” option.
- Add the desired IP addresses to be whitelisted.
- Save the changes you have made.
- Ensure that solely authorized IP addresses have access to your Smartproxy account.
- Regularly review and update your list of whitelisted IPs for enhanced security purposes.
By adhering to these instructions, you can fortify the security of your Smartproxy account by restricting access solely to authorized IP addresses.
2. Username and Password
When it comes to authentication methods in Smartproxy, one option to consider is the use of a username and password. This method involves providing a unique username and a secure password to gain access to the system.
To set up this authentication method, follow the step-by-step guide provided by Smartproxy. This method offers a balance between security and convenience, as users have control over their login credentials. It’s essential to choose a strong password to ensure the security of your account.
It’s important to keep in mind that username and password authentication is a common and widely used method across various platforms and services.
3. Token-based Authentication
Token-based authentication is a secure and convenient method used by Smartproxy. Here are some key points to understand about token-based authentication:
- Tokens are unique and randomly generated strings that act as credentials.
- When a user logs in, the server generates a token and sends it to the client.
- This token is then included in subsequent requests to authenticate and authorize the user.
- Token-based authentication eliminates the need to store sensitive information like usernames and passwords on the server.
- Tokens can have an expiration time, ensuring enhanced security.
Fun Fact: Token-based authentication provides a scalable and efficient way to handle authentication in modern web applications.
How to Set Up Authentication in Smartproxy?

Discover how to easily set up authentication in Smartproxy and enhance your online security. From step-by-step guidelines for IP whitelisting to username and password authentication, and even token-based authentication, this section will provide you with practical tips and techniques. Safeguard your online activities by implementing the right authentication method for your Smartproxy account. Say goodbye to unauthorized access and hello to a more secure browsing experience.
Step-by-Step Guide for IP Whitelisting
- Follow this step-by-step guide for IP Whitelisting in Smartproxy:
- Access your Smartproxy account and go to the authentication settings.
- Choose the option for IP Whitelisting.
- Click the “Add IP” button to whitelist a specific IP address.
- Enter the desired IP address in the designated field.
- Save the whitelisted IP address to implement the changes.
- To remove a whitelisted IP address, simply click the “Remove” button next to it.
Step-by-Step Guide for Username and Password
- Follow this step-by-step guide to set up username and password authentication in Smartproxy:
- First, log in to your Smartproxy account.
- Next, navigate to the dashboard and click on the “Authentication” tab.
- Then, choose “Username and Password” as your authentication method.
- Create a combination of username and password.
- Finally, click on the “Save” button to apply the changes.
Pro-tip: When selecting a password, ensure you use a strong and unique combination of characters, numbers, and symbols to maximize the security of your Smartproxy account.
Step-by-Step Guide for Token-based Authentication
Step-by-Step Guide for Token-based Authentication
To set up token-based authentication in Smartproxy, follow these steps:
- Generate a unique API token in your Smartproxy dashboard. This token will authenticate your requests.
- Incorporate the token into your requests by adding an authorization header. The header should include “Bearer” followed by the token.
- For each request, the server will verify the token’s validity before providing access to the requested resources.
- Monitor and manage your token-based authentication through the Smartproxy dashboard, where you can generate new tokens, revoke existing ones, and track usage.
By following this step-by-step guide for token-based authentication, you can enhance the security of your Smartproxy connections and ensure authorized access to resources.
Choosing the Right Authentication Method
When it comes to Smartproxy authentication methods, choosing the right one is crucial. In this section, we’ll discuss two key considerations: security and convenience. We’ll explore the factors that come into play when determining the level of security each method provides, as well as the convenience it offers for seamless use. So, let’s dive in and discover the best authentication method for your specific needs!
Considerations for Security
When choosing an authentication method for Smartproxy, it is crucial to prioritize security. Considerations for security include the following:
- Encryption: Opt for authentication methods that use strong encryption protocols to protect sensitive information.
- Two-Factor Authentication: Implement an extra layer of security by requiring users to provide a second form of verification, such as a unique code sent to their device.
- Access Control: Choose authentication methods that allow for granular access control, ensuring that only authorized users can access resources.
- Password Policies: Enforce strong password policies, including requirements for length, complexity, and regular password changes.
Fact: According to a report by Verizon, 81% of hacking-related breaches are due to weak or stolen passwords.
Considerations for Convenience
- Convenience is an important factor to consider when choosing an authentication method for Smartproxy. Here are some key considerations for convenience:
- 1. User-friendly: Look for authentication methods that are easy to set up and use, saving you time and effort.
- 2. Compatibility: Ensure that the chosen method is compatible with your existing systems and applications, allowing for seamless integration.
- 3. Flexibility: Opt for authentication methods that offer user management and access control flexibility, allowing you to customize permissions and settings based on your needs.
- 4. Single Sign-On (SSO): Consider using an SSO solution if you have multiple applications or platforms to access, streamlining the authentication process and providing a convenient user experience.
- 5. Mobile-Friendly: If you frequently access Smartproxy on mobile devices, choose an authentication method that supports mobile-friendly authentication, such as biometric authentication or QR code authentication.
By considering these considerations for convenience, you can ensure a smooth and user-friendly authentication experience with Smartproxy.
Common Issues and Troubleshooting

When it comes to using Smartproxy, there are some common issues and troubleshooting that users may encounter. Here are a few troubleshooting tips to help resolve these problems:
- Authentication errors: Double-check your credentials and ensure they are entered correctly.
- Connection issues: Make sure you have a stable internet connection and try reconnecting to the proxy server.
- Proxy compatibility: Verify that the proxy settings are compatible with the software or browser you are using.
- IP blocking: If you are experiencing blocks, try switching to a different proxy server or rotating your IP address.
- Banned or flagged proxies: Contact Smartproxy support if you suspect a banned or flagged proxy.
Remember, if you encounter any common issues and troubleshooting, it’s always a good idea to reach out to Smartproxy’s customer support for further assistance. They are available to help you troubleshoot and resolve any problems you may be experiencing.
Some Facts About Smartproxy Authentication Methods:
- ✅ Smartproxy offers two types of authentication methods: User:pass authentication and Whitelisted IP. (Source: Our Team)
- ✅ User:pass authentication allows users to create, edit, and delete proxy users in the Datacenter (Pay/IP) > Proxy setup page. (Source: Our Team)
- ✅ The whitelisted IP authentication method allows users to manage whitelisted IPs in the same page, specifically in the Whitelisted IP tab next to Username:Password. (Source: Our Team)
- ✅ Smartproxy recommends using traditional username:password authentication method instead, especially when using services like Amazon Web Services. (Source: Our Team)
- ✅ The selected protocol during the purchase of dedicated datacenter proxies may also be displayed. (Source: Our Team)
Frequently Asked Questions

How do I create a proxy user with user:pass authentication?
To create a proxy user with user:pass authentication, go to the Datacenter (Pay/IP) > Proxy setup page and create a new user. Fill in the desired username and password, and click on the Create button.
What format should the IP address be in when adding to the whitelist?
The IP address should be in IPv4 format (xx.xx.xx.xx) when adding it to the whitelist in the Whitelisted IP tab next to the Username:Password in the Residential proxies > Static (ISP) page.
Can I use dedicated proxies for authentication?
Yes, dedicated proxies can be used for authentication. To do this, you need to use the credentials (username and password) provided for authentication when using dedicated proxies.
How can I change my dashboard password without affecting my proxy user credentials?
Changing your dashboard password does not affect your proxy user credentials. You can change your dashboard password in the Dashboard settings, and your proxy user credentials will remain the same.
Can I use the same proxy user credentials for multiple users?

No, each user must have unique proxy user credentials. You can create up to five different users with unique combinations of symbols (excluding “@” and space) for the username and password. Additional users can be added at a cost of $6 per user.
What should I do if I forget my dashboard login password?
If you forget your dashboard login password, you can use the “Forgot your password?” option on the login page. Follow the instructions provided to reset your password and regain access to your dashboard.
I’m Amine, a 34-year-old mobile enthusiast with a passion for simplifying the world of proxy providers through unbiased reviews and user-friendly guides. My tech journey, spanning from dial-up internet to today’s lightning-fast mobile networks, fuels my dedication to demystifying the proxy world. Whether you prioritize privacy, seek marketing advantages, or are simply curious, my blog is your trusted source.


Leave feedback about this